Monday, April 29, 2013

Cooking Out in the Backyard

This is the time of the year that I look forward to and enjoy. When I go out back and spoof things up in preparation for the summer parties. I so enjoy the warm summer months when my friends and family come over to my place for cook outs and BBQs. If I could, I'd have everyone over every single week. I just love spending time with the people that I love and it seems like the time goes by so fast when we are all together.

 But having all those people over can be a little hard on the wallet, so I'm going to share some of my favorite tips on how to stay within your budget and still having fun.

Coupons: I constantly look for coupons for condiments, meats that can be frozen for a few months at a time, canned goods that go well with barbecued food (baked beans anyone?) I like to use these coupons when the items are already on sale at my grocery store to really amp up my savings. Then I just store everything until I'm ready to use it over the summer.

Easy Cheap Food: When we have an extra large crowd I like to stay with hotdogs, burgers, or chicken. I tend to do the chicken and burgers when there are more adults coming over as the kids seem to like the hot dogs the most and I like to cook for as few leftovers as possible. When I have too  many leftovers I can never seem to eat it all and inevitably wind up with wasted food, and wasted food is wasted money.

Potluck Style: If you are providing the main course or meat options, then don't be shy to ask guests to bring their favorite side dishes to share with everyone. This cuts down on your expenditures and a lot of the time guests are more than happy to help.

Dollar Store: Utilize your local dollar store for paper plates, cups, plastic ware, decorations, etc.

If you already own a grill then put it to good use, clean it up if needed and possibly make repairs, however if this is going to be the first summer you are having cookouts and you don't own a grill, you may want to consider investing in a small indoor grill first to be sure that you enjoy cooking for a large group of people. Plus an indoor grill can easily be used year round and isn't as expensive as a nicer outdoor grill. Then if you decide that you want to invest in a larger grill, you can, if you decide cooking out isn't for you and you'd rather gather at a friend's house you haven't invested in an appliance you aren't going to ever use again.


Cook Out

Monday, April 22, 2013

Fixing Cornbread in a Cast Iron Skillet

All my memories that involve cornbread feature this side dish in a well worn cast iron skillet. Every woman in my family had their own skillet that they always used to make corn bread in. So naturally I stuck with tradition. I now own my own 8-inch cast iron skillet that I make my corn bread in. My favorite recipe is one that my grandmother gave me, the title on it is Pawn Bread, but I've always called it corn bread and I'm not changing now.

Cornbread

Ingredients:
2 cups of cornmeal
2/3 cups of flour
1-1/2 tablespoons of baking powder
3/4 teaspoon of baking soda
1/2 teaspoon of salt
a pinch of black pepper (though sometimes I add two)
1-2/3 cups of buttermilk
2-3 tablespoons of bacon drippings, in a pinch I've been known to use sausage grease. My mom would sometimes use lard instead.

Directions:
Preheat your oven to 400 degrees Fahrenheit. Place your bacon drippings into your cast iron skillet and use a paper towel to coat the interior sides of the skillet with your grease. Place skillet into the oven while it is preheating and while you are making the cornbread batter.

In a medium sized bowl add all of your dry ingredients and mix them well. Add about three fourths of your buttermilk and stir well. Remove your skillet from the oven and slowly add about 1 tablespoon of the hot oil from the skillet to your mixture being sure to stir well (and for goodness sakes use a pot holder to pick up that skillet!!!) Also your skillet and bacon grease should be hot but not smoking.

Carefully add the rest of your buttermilk, being sure to watch the consistency of your batter. Stir constantly. Your batter should be about the consistency of thick pancake batter. If your mix is to thick add a little more buttermilk, if it is too thin add a bit more cornmeal. Lightly sprinkle the skillet's bottom with dry corn meal and pour it into the batter and place your skillet immediately into your preheated oven. Bake at 400 degrees for about 25 minutes. The amount of time can vary due to the batter's consistency. Watch your cornbread after it has been baking for about 20 minutes and cook it until the top is a nice golden brown. Then remove from the oven and allow to cool a bit before serving.

I hope you try the above recipe and enjoy it! Corn bread is one of my favorite breads to have as a side with most meals.

Wednesday, April 17, 2013

Ball Blue Book for Preserving Info

When I'm preserving my harvest for the winter months there is only one book that I rely on. That book is none other than the Ball Blue Book. This is known as THE guide book for canning and preserving. My copy has over 125 full color pages with tons of photos.

This book is known by many as the classic American guide to keeping fresh tasting food year round. It has step by step instructions to guide you through the canning process and also helps you learn how to make sure that the quality of your canned food is good. It also has adjustments that need to be made for different altitudes, pre-canning planning info and much more. It also has a neat section that tells you how to use certain canning tools.

If you are on a special diet then there are some suggestions in the book how to alter recipes so that they will fit into your lifestyle.

This book is a must have for anyone who plans on canning or preserving their garden harvests. So invest in the Ball Blue Book and you will not regret it. It is also super affordable, I've bought magazines that cost more.

Ball Blue Book
Also a great source for people who do a lot of canning is Pressure Cooker Outlet for canning jars.

Friday, February 15, 2013

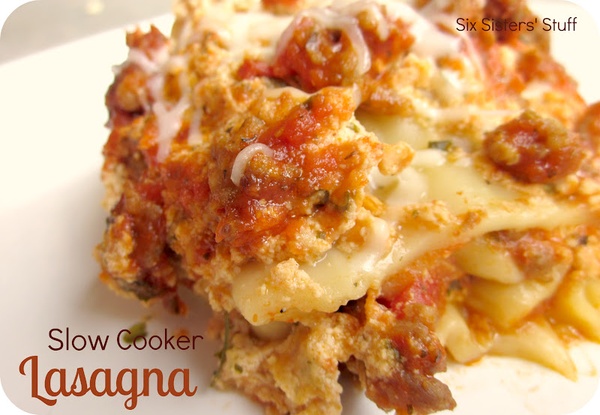
Lasagna in a Crock Pot


I was on Pinterest looking for some recipes for my crock pot. I've been super busy lately, and the crock pot has become my friend.

I was able to find an awesome lasagna recipe:
Slow Cooker Lasagna

The link led me to Six Sisters' Stuff: Slow Cooker Lasagna Recipe. I tried out this recipe last night and it's awesome. I would've taken a pic of mine, but it didn't turn out as pretty looking as theirs, but still tasted great.

Their recipe is below, with some notes of what I did differently:

Ingredients:
1 lb. lean ground beef (could be substituted for Italian sausage) <-I used 1/2 lb. lean ground beef and 1/2 lb. ground turkey
1 (24 oz) jar spaghetti sauce <-I used homemade spaghetti sauce that I canned last fall
1 cup water
1 (15 oz) container of ricotta cheese (can use skim ricotta)
1 pkg. Kraft Italian Cheese (approx. 2 cups) <-I used the store brand, but it still tasted yummy
1/4 cup grated Parmesan cheese
1 egg
2 tablespoons parsley
6 regular lasagna noodles, uncooked

Directions:
Brown meat in large skillet; drain. Stir in spaghetti sauce and water. Mix ricotta, 1-1/2 cups Italian cheese, 2 tablespoons Parmesan, egg and parsley.
Spoon 1 cup meat sauce into slow cooker; top with 3 lasagna noodles, broken to fit; and half of cheese mixture. Cover with 2 cups meat sauce. Top with remaining noodles, broken to fit; cheese mixture and meat sauce. Cover with lid.
Cook on low 4-6 hours or until liquid is absorbed. Sprinkle with remaining cheese; let stand, covered, 10 min. or until cheese is melted.
This recipe is just amazing, my friends that came over after work Friday just loved it. Even with the few small changes I made. I tend to tweak every recipe a little so that it fits into my life and budget more easily.

Monday, May 9, 2011

Kitchen Kettle Recipes

The Presto Kitchen Kettle is a great appliance for every kitchen. It has many uses from deep frying to steaming vegetables. The Kitchen Kettle is dishwasher safe so clean up is a breeze. Before you use the Kitchen Kettle for the first time you need to “season” it. You do that by lightly rubbing the cooking surface with cooking oil. Remove excess oil with a paper towel. Its best to use wooden, or rubber utensils to stir or turn your food to prevent scratching the cooking surface. The cooking surface is non-stick.

Make sure you sit the Kitchen Kettle on a dry level heat resistant surface when cooking. Also make sure the heat control does not dangle off the counter or table. When plugging in your heat control make sure you use 120v AC polarized outlet. Now your are ready to cook.

The Kitchen Kettle is great to use to simmer soups, stews, or casseroles. The heat control will maintain the temperature. Below is a great recipe for simple chicken soup stock, and beef stew.

Chicken Soup Stock

2 pounds of chicken                              
2 ribs celery, chopped
2 quarts of water                                 
2 carrots, diced
1 teaspoon salt                                     
1 onion, chopped

Cut chicken into serving pieces. Place all ingredients into multi-cooker. Set heat control at 250 degrees and bring to a boil. Reduce heat to 212 degrees. Cover and simmer 2 to 3 hours. Strain stock.

Traditional Beef Stew

1 tablespoon cooking oil                                
½ tablespoon pepper
2 pounds beef stew meat cut into                
1 small onion, diced, 1 inch cubes
3 carrots, cut into 1 inch pieces
1 quart water                                               
1 cup sliced mushrooms
½ tablespoon salt                                         
1 cup of peas
½ tablespoon pepper                                    
1 cup celery, ½ inch pieces

Preheat multi-cooker to 375 degrees. Add oil and brown meat. Reduce heat to 212 degrees. Add water, salt, and pepper. Cover and simmer 1 to 2 hours. Add remaining ingredients. Cover and simmer 30 minutes or until vegetables are tender. If desired, thicken with a paste made of cornstarch and water. Makes 6-8 servings.

Another use for the Presto Kitchen Kettle Multi-Cooker Steamer is boiling fresh or frozen vegetables. All you need to do is place 1 to 2 cups of salted water into the cooker. Set your heat control to 250 degrees and bring to a boil. Add  prepared vegetables. Cover and return to a boil. Cook vegetables until tender. Be careful not to over cook. When boiling strong flavored vegetables make sure to almost cover with water.

The Kitchen Kettle multi-cooker is great for blanching vegetables before freezing. Do not forget to wash your vegetables before cutting into uniform pieces. Place 4 quarts of water into the cooker. Set heat control to 250 degrees and bring to a rolling boil. Place your vegetables into the basket and lower into boiling water. Cover and boil for time specified in your manual. After heating, use a potholder to carefully grab basket handle. Plunge vegetables into cold water to cook quickly and thoroughly. When cooled remove from water and drain. Now you can freeze your vegetables.

The kitchen Kettle is so versatile you will use it every day. Its easy to clean with a non-stick surface inside and out and don’t forget its dishwasher safe. It will make a great gift for the cook in your family. You can find this presto appliance online at Pressure Cooker Outlet (pressurecooker-outlet.com) for a great price.

Tuesday, April 26, 2011

How to Make Sauerkraut from Scratch

Since summer will be here very soon, I want to share a recipe with you that my grandmother has used every single summer that I can remember:

Sauerkraut in a Crock

Ingredients: for 1 gallon of Sauerkraut

5 pounds to every 3 tablespoons sea salt (Granny using a sack of eight cabbage heads) 1 cup of white vinegar
  • You will need a cellar, basement or a cool dry place to store
  • Ohio Stoneware Crock
  • Grater or food chopper
  • A plate that fits down inside a crock. You do not want any air or open space to get to your kraut this will ruin the taste a little .Also fill a bag full of water, large enough to cover the crock well to give it more of an air tight seal. (remember to let the air out of bag before placing it on top of  the crock).
Getting Started:
  • Shred or chop your cabbage the way you like it. Sprinkle salt as you go along. This will create a liquid brine. Now your cabbage will  start to ferment and sour without rotting.
  • Next Mix all of your ingredients together and pack your cabbage in your Ohio Stoneware crock. Make sure you pack a little bit at a time, using a spoon to push down hard several times, this will help force the water out of the cabbage. Keep punching your kraut down until you have enough liquid or brine that rises above the cover. If the brine does not rise above cover by the next day ,you can always add enough salt to bring the brine liquid level above the plate. Add you a teaspoon of salt to a cup of water and stir.
  • Cover your Sauerkraut with a plate, and fill a bag up with water, let all the air out and tie,( large enough bag to cover the crock, )use this as your weight. The last thing you will need to do is take a couple of towels and cover to keep the dust off of your crock and store in a cool dry place for 2 weeks.
If you want to try this recipe for pickling cabbage (aka making sauerkraut) and are in need of an Ohio Stoneware crock don’t wait until the summer season is already here, because they might sell out of them, I found that out the hard way a few years back. I have found the Ohio Stoneware Crocks are 100% made in the USA and there are so many sizes to choose from that will suit you the best.